Inviting a New Learner to Your Site and Assigning Content
Add learners to your site and grant access instantly through the manager interface. Read on to learn how to invite them via email for quick access to specific sublicenses.
While there are multiple ways for a learner to get access to your learning site and content, inviting a learner to your site and granting them access to specific content through an email invitation is the simplest option for one-by-one additions.
See also: How to Manage Learner Progress
Use Case Information
Use this process if you want a small number of learners to receive an email invitation to your learning site. You have to assign at least one component of access a sublicense if you are inviting learners one by one in the manager interface.
How to Invite a New Learner to Your Site
- From your homepage, select Users > Learners.
- In the top right, select the Gear icon > Add Learner.
- Enter the learner's first name, last name, and email address.

- If you would like to send a customized message in the learner's email invitation, complete the Invite Message field.
- Click Invite at bottom right.
Notes, Tips and Considerations
Invitation Expiration
Learner invitations do not expire. If you would like to revoke the invitation, you must disable the user so the invitation will no longer be valid.
Valid Email
The learner will receive an email invitation to the learning site, so be sure to enter a valid email address.
Password Creation
When the learner accepts the invitation, they will be prompted to generate a unique password for future logins.
Terms and Conditions
Learners need to agree to terms and conditions before proceeding to the learner dashboard.
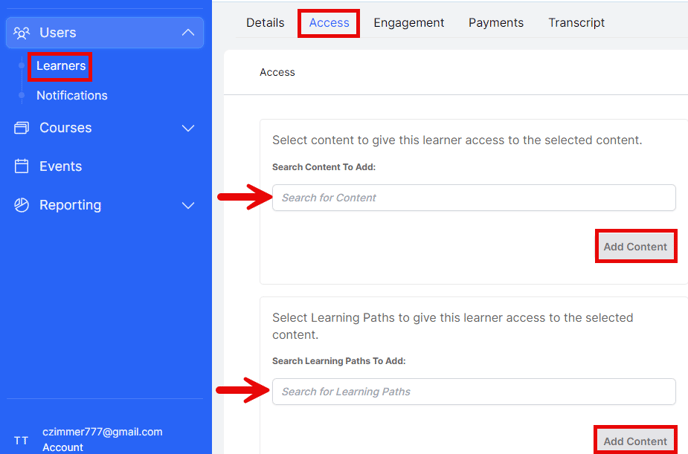
Assigning Content to Existing Learners
Learners can elect content from your catalog and other front end content displays. Additionally, you may have content that you want to map or assign to Learners. In order to begin assigning content, you will need to open the Learner profile and open the Access tab.